

Kebayakan pengguna sering mengeluhkan tidak bisa menyimpan hasil perubahan berkas hosts tersebut karena tidak punya permission sebagai administrator, contoh seperti gambar 1.

File Hosts merupakan berkas komputer yang digunakan oleh sistem operasi untuk pemetaan hostname ke IP address. File Hosts berbentuk file text biasa (plain-text) dan nama filenya dinamakan dengan “hosts”. Letak berkas tersebut ada di dalam folder C:\windows\system32\drivers\etc\
lalu bagaimanakah cara supaya file host tersebut dapat disimpan? maka dari itu silahkan disimak dan dibaca dengan teliti tutorialnya.
Edit File Hosts di Windows 10
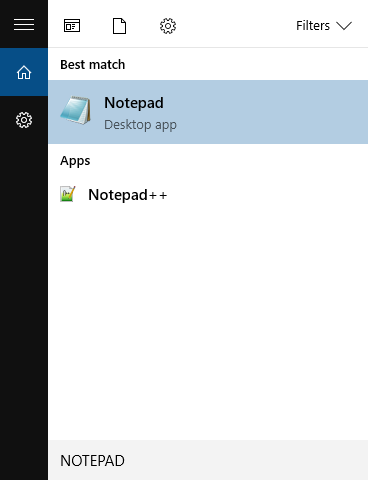
- Klik Logo Windows (Start) > Ketik tulisan “Notepad” lalu hingga muncul aplikasi seperti gambar diatas, kemudian klik kanan > pilih Run as Administrator
- Setelah terbuka aplikasinya, lalu FILE > OPEN > Browse pada folder direktori file hosts terletak C:\windows\system32\drivers\etc\ pilih file “hosts”
- Proses Edit: Silahlan edit file hostnya, jika ingin menambahkan IP address yang baru jangan lupa tambahkan simbol “#” (hastag) disertai dengan alamat Ip address dalam satu baris yang sama


- Proses Menyimpan: klik menu FILE > SAVE atau tekan tombol keyboard CTRL+S untuk menyimpan hasil pengeditan. ( ingat jangan disimpan dalam format .txt, cukup kalian klik file yg sebelumnya dan save, maka akan muncul konfirmasi replace file lalu kamu pilih “Yes” untuk menimpa file yang sebelumnya.
- Selesai
Edit File Hosts di Windows 7 dan Vista
pada windows Vista dan Windows 7 harus menggunakan User Account Control (UAC), jadi pada aplikasi Notepad harus dijalankan as Administrator.
- Klik Start -> All Programs -> Accessories
- Klik Kanan pada aplikasi Notepad dan pilih Run as administrator
- Klik Continue pada “Windows needs your permission” UAC window.
- Untuk membuka file host pada “Notepad” silahkan klik File -> Open
- Arahkan folder tujuaan ke direktori: C:\Windows\System32\Drivers\etc\hosts
- Lalu klik open
- lalu ubah sesuai keinginan
- lalu simpan file tersebut tanpa ekstensi .txt
Edit File Hosts di Linux
- Buka aplikasi “terminal “
- Setelah itu ketikan sudo nano /etc/hosts
- Lalu masukan password
- Dan selanjutnya tinggal diubah sesuai keinginan
Edit File Host di Mac Os
Mac OS X 10.0 – 10.1.5
- Open /Applications/Utilities/NetInfo Manager.
- To allow editing the NetInfo database, click the padlock in the lower left corner of the window.
- Enter your Admin password and click OK
- In the second column of the browser view, select the node named “machines.” You will see entries for -DHCP-, broadcasthost, and localhost in the third column.
- The quickest way to create a new entry is to duplicate an existing one. So select the “localhost” item in the third column.
- Choose Duplicate from the Edit menu. A confirmation alert appears.
- Click Duplicate. A new entry called “localhost copy” appears, and its properties are shown below the browser view.
- Double-click the value of the ip_address property and enter the IP address of the other computer.
- Double-click the value of the name property and enter the hostname you want for the other computer.
- Click the serves property and choose Delete from the Edit menu.
- Choose Save from the File menu. A confirmation alert appears.
- Click Update this copy.
- Repeat steps 6 through 12 for each additional host entry you wish to add.
- Choose Quit from the NetInfo Manager menu. You do not need to restart the computer.
Mac OS X 10.6 – 10.1.8
- Open Applications > Utilities > Terminal.
- Open the hosts file by typing the following in the Terminal window:
sudo nano /private/etc/hosts
Type your user password when prompted - Edit the Host File,The hosts file contains some comments (lines starting with the # symbol), as well as some default hostname mappings (e.g. 127.0.0.1 – local host). Append your new mappings underneath the default ones.
- Save the Host File, When done editing the hosts file, press Control+x to save the file.
- Make your changes take effect by flushing the DNS cache with the following command:
$ dscacheutil -flushcache - New mappings should now take effect.
keyword : Cara Edit File Hosts windows\system32\drivers\etc\hosts windows 7


![download[4]](http://edwardsync.net/wp-content/uploads/2016/03/ezgif-1447380043.gif)